Yields:
8 - 10 serving(s)
Prep Time:
25 mins
Total Time:
4 hrs 15 mins
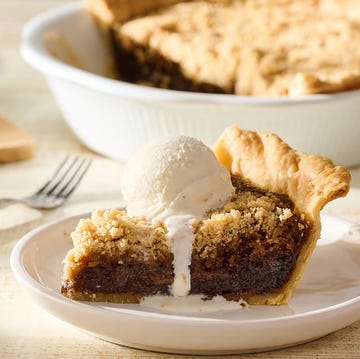
If you're like me and lose all self control around a plate of lemon bars, then this delightful lemon chess pie is your next obsession. I always go bonkers over the lemon bars at the Merc—they’re tart, tangy, sweet, and extremely dangerous to have around—and this delightful pie really reminds me of them. The filling is smooth and packs a big citrus punch, and the crust is just a good simple homemade pie crust (store-bought pie crust works in a pinch). I even like to finish the pie with a nice coating of powdered sugar, just like the bars! This recipe is pretty easy as far as homemade pies are concerned, and the best part is that it's one of those lemon desserts that works for any season—hot summer picnics, holiday dessert tables, or Tuesdays when you just need something lemony in your life.
Can you use bottled lemon juice?
No, fresh lemon juice is the way to go for this recipe. It has a much brighter, more vibrant lemon flavor than the bottled kind. Plus, since this recipe calls for lemon zest, you’ll need fresh lemons on hand anyway!
Should lemon chess pie be refrigerated?
Yes! Once the pie has completely cooled, wrap it tightly in plastic and store it in the fridge. It'll stay fresh for up to five days. Just hold off on dusting it with powdered sugar until right before you're ready to serve. There's absolutely nothing better than a slice of chilled lemon chess pie!
Advertisement - Continue Reading Below
Ingredients
- 1 Tbsp.
all-purpose flour, plus more for dusting
- 1
unbaked pie crust
- 1 3/4 cups
granulated sugar
- 1/2 cup
(1 stick) salted butter, melted
- 4
large eggs
- 2 Tbsp.
yellow cornmeal
- 1 tsp.
vanilla extract
Grated zest and juice of 3 medium lemons (about 1 ½ tablespoons zest and ½ cup juice)
Yellow food coloring (optional)
Powdered sugar, for dusting
Directions
- Step 1Preheat the oven to 400˚F.
- Step 2On a lightly floured surface, roll the pie dough into a 12-inch circle. Transfer the crust to a 9-inch pie plate (not deep-dish). Tuck the edges of the crust under and crimp as desired. Refrigerate for 30 minutes (or freeze for 15 minutes).
- Step 3Line the crust with parchment paper or foil and fill with pie weights or dried beans to prevent puffing or slumping. Bake until the edges of the crust are very lightly golden, 16 to 18 minutes.
- Step 4Remove the pie weights and parchment paper. Using a fork, prick the bottom and sides of the pie crust a few times to keep it from puffing. Return the crust to the oven and bake until it is set, dry, and very lightly golden, 5 to 7 minutes more. Allow to cool slightly. Reduce the oven temperature to 350˚F.
- Step 5In a large bowl, whisk together the granulated sugar and melted butter until well combined. Whisk in the eggs, one at a time, until well combined. Whisk in the cornmeal, flour, vanilla, lemon zest, lemon juice, and a few drops of yellow food coloring, if you like.
- Step 6Carefully pour the filling into the crust. Bake until the edges and center of the pie are set completely, 50 to 55 minutes, tenting the pie with foil after 30 minutes to prevent excess browning.
- Step 7Let the pie cool completely, about 2 hours. Top with a sprinkle of powdered sugar, if you like.
Tip: The crust can be par-baked up to 2 days in advance, wrapped tightly in plastic once fully cooled, and kept at room temperature. The baked pie can be fully cooled, covered in plastic, and refrigerated for up to 5 days. The pie can also be tightly wrapped whole or in slices and frozen for up to 3 months. Allow to thaw at room temperature before enjoying.
Advertisement - Continue Reading Below

How to Pick the Best Apples for Homemade Pie

Labor Day Desserts for Sweet End of Summer

How To Make Easy Cinnamon Roll Peach Cobbler

The Best Peach Desserts Ripe With Juicy Sweetness
Advertisement - Continue Reading Below
Advertisement - Continue Reading Below


